

For anyone who’s looking for a guide to cutting wood slices with a chainsaw, this article is for you!
Using chainsaws is the easiest way to cut wood. In fact, chainsaws cut wood faster than any other tool; as smoothly as cutting through butter. You can cut wood logs of any size and thickness without difficulty. All you have to do is to make sure your chainsaw is powerful enough for your type of job.
After cutting larger logs of wood, they further need to be cut down into smaller pieces in order to make them usable. Just learn how to use a chainsaw in an appropriate way, and you’ll be able to deal with any type and size of wood.
To cut wood slices using your chainsaw, you won’t really need a lot of other things. A high-quality and powerful saw, tape for measurements, a wood jig, a level, and an orbital sander are the only things you’ll require. Also, because chainsaws come both battery-powered and gas-powered, it depends on your own personal preference and your job suitability to choose one of these types of chainsaws.
Our today’s article contains two methods for cutting wood slices with a chainsaw. Continue reading and by the end of it, you’ll know how to cut large tree trunk slices for different purposes.
Things You’ll Need While Working with a Chainsaw
Safety first. Always. Do not ever take a risk with chainsaws. They could be the most dangerous tools if not handled properly or if protection is taken for granted.
Protective Attires
Here are some protective attires that must be used while working with a chainsaw.
- Chainsaw chaps
- Thick gloves to protect your hands
- Eye goggles for the safety of the eyes
- Ear protection to protect ears from the noise
Tools
Tools required for cutting wood slices are:
- Level
- Measuring tape
- Wooden jig
- Orbital sander
Two Methods for Cutting Wood Slices with Chainsaw
While there could be different methods and techniques for cutting wood slices with different types of chainsaws, there are two most effective methods used by most homeowners as well as professionals.
- The ‘Freehand and Fast’ Method
- Building and Using a Jig
THE ‘FREEHAND AND FAST’ METHOD
This one is the most used method. Here are the steps to be followed if you prefer using this method.
- Tree Logs Should be Propped Up
- Find the Knots in the Trees
- Tree Log Measurement and Marking
- Set the Saw to Work
- Continue Cutting and Repeating
STEP 1: Tree Logs Should be Propped Up
Always start up with positioning and placing the tree log correctly. It’s not a good decision to start cutting the log by placing it on the ground level. This is because firstly, it would be hard to control the cuts and there would be a high risk of your chainsaw hitting the ground at some point which would ultimately affect the chainsaw’s blade.
Also, keeping the wood log on the ground would make you bend a lot, maybe for a long period too. You’d end up having an uncomfortable cutting position and might have a hurting back as well. So, it’s very important to prop up the wood log on a sawbuck.
STEP 2: Find the Knots in the Trees
Knots in trees form when the wood is crowded together in a circular pattern. Circles that protrude from the trunk and those that do not run along the bark should be looked for.
If the tree log you’re cutting, has knots in it, it would damage the chainsaw’s blade and chain and could be extremely dangerous for you too. Knots can make your chainsaw operate in unexpected or unwanted ways and they could be a major reason for kickbacks too.
So, the next thing you need to do after propping up the tree log is to look for the knots and avoid them while cutting. This will protect you and your chainsaw as well.
STEP 3: Tree Log Measurement and Marking
Now, because your main concern is to cut large wood logs into smaller slices, you’ll need to measure and mark the size or thickness of the slices. Just decide how many inches of wood slice you intend to cut, and then using the measurement, mark the tree log all around.
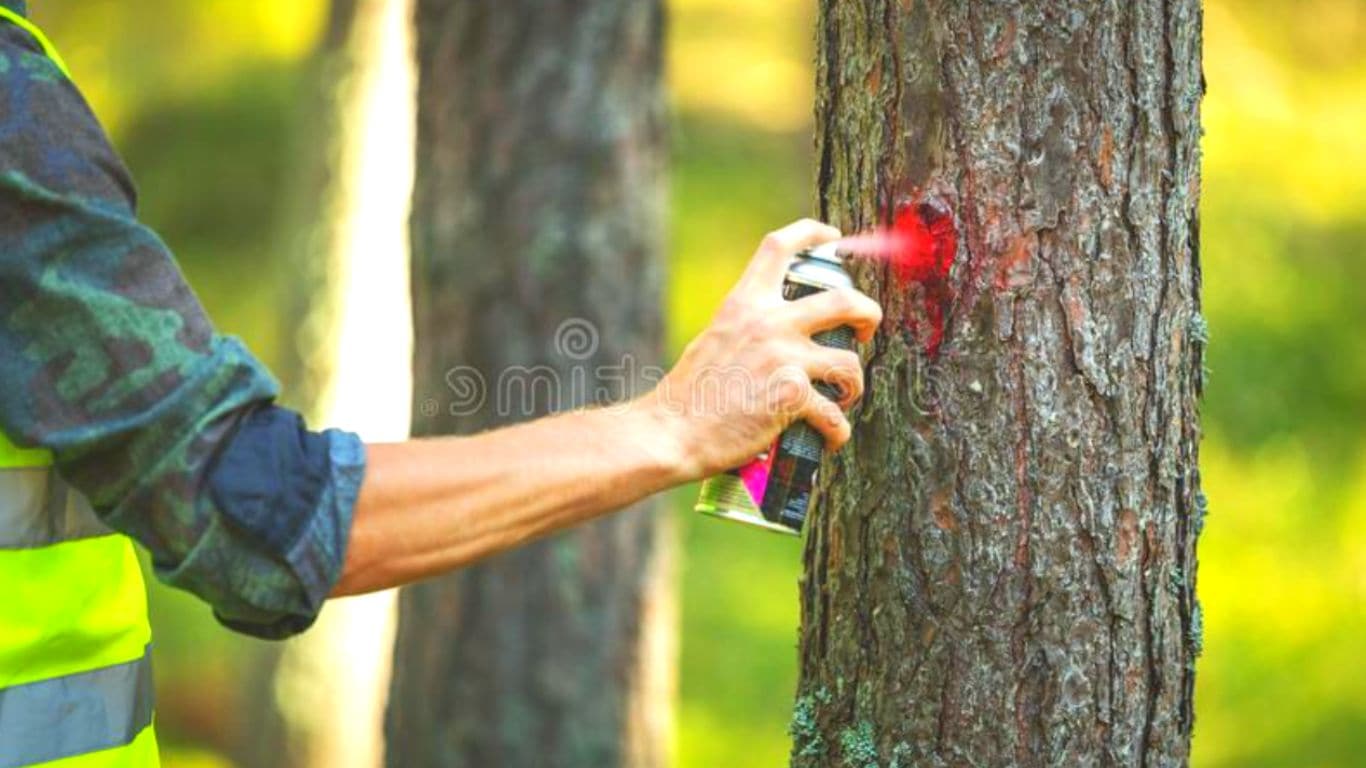
This will help you stay focused along the marking you’ve marked, and you’ll get precise and accurate cuts. The resulting cuts would be leveled and steady.
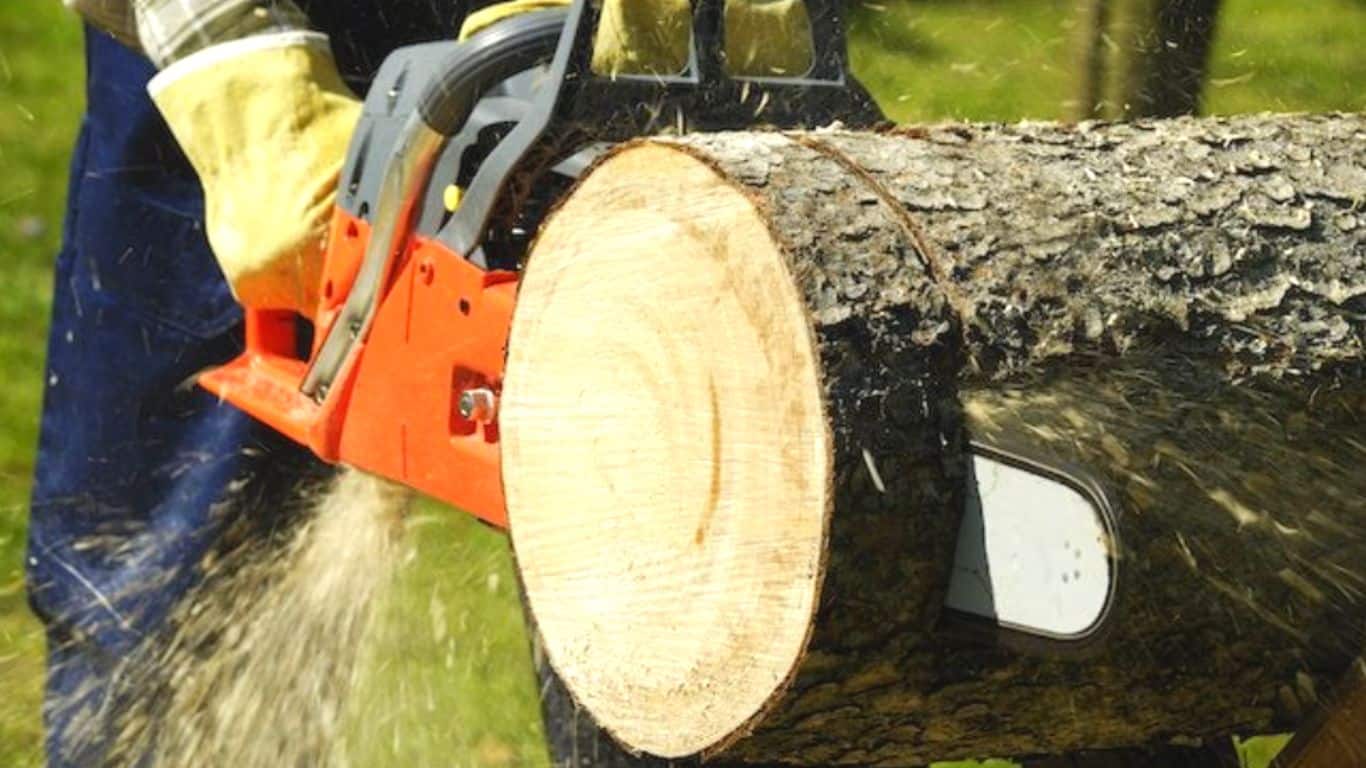
STEP 4: Set the Saw to Work
Now is the time for your chainsaw to work. Start it up, hold it comfortably in both hands, and start cutting.
To cut through the tree trunk, squeeze the throttle and lower the blade slowly. Do not put a lot of pressure on while pushing the chainsaw through the cut. Apply gentle pressure and the chainsaw would push in on its own.
In case you feel like you have to put a lot of effort into pushing the chainsaw through the cut, that means the chain is dull and you should in no way continue with a dull chain. Stop right there and sharpen the chain first.
STEP 5: Continue Cutting and Repeating
Continue cutting by just following the mark you made and let the slices fall on the ground. Repeat the same steps for as many slices as you want to cut the wood into.
BUILDING AND USING A JIG
For anyone who isn’t sure of the jig, wood-slicing jigs are simply nailed-together pieces of 2 x 4 that serve as guides for chainsaw blades as they cut through trees.
To locate knots and set up the tree log in a chainsaw horse, follow steps 1 through 2 in the Freehand and Fast method which we described above.
Here are the steps to follow if you’re using the Jig method.
- Building the Jig
- Make Sure the Chainsaw Blade is Prepared
- Jig the Tree Log
- Set the Saw to Work
- Continue Cutting and Repeating
STEP 1: Building the Jig
The jig method helps you use a chainsaw without any variation in the thickness of wood which lets you cut wood slices more precisely. And for this method, you’ll need to build the jig first.

Take a measurement of the diameter of the log you intend to slice. Then measure the length of the 2 x 4 and cut it into two equal pieces. You’ll need 2 more pieces. These two pieces of 2 x 4 should be at least four inches longer than the first one. By doing this, you will be able to make a box with some extra space.
Here’s how you’ll build the box: Nail the 2 x 4 pieces together. As soon as this box is placed on the tree trunk, it will be able to slide over it.
One of the first pieces of 2 x 4 you cut should be nailed to the side of one of the second pieces of 2 x 4. Starting at the end of the longer board is best.
Then, using the first piece of 2 x 4 that you nailed together, slide it along the trunk to get an idea of where the second shorter piece needs to be nailed. The shorter 2 x 4 piece should be nailed into the longer 2 x 4. You’ll have a U-shaped box.
To finish, nail the last 2 x 4 lumber to the tips of the U-shaped box. The result would be a 2 x 4 box.
STEP 2: Preparing the Chainsaw Blade
Preparing the chainsaw blade is important to get perfectly leveled cuts. Get two scrap pieces of wood with a thickness of at least one inch and equal sizes.
Then attach these pieces with the chainsaw. The right side of the chainsaw blade should be glued with one of the wood pieces. The other one should be glued near the tip on the same side as the first.
With this setup, the chainsaw chain will be raised above the jig, allowing the blade to slide over the 2 x 4s without touching it.
STEP 3: Jig the Tree Log
As you slide the jig over the tree log, ensure it has enough clearance at the top for the thickness of the cut you wish to make. Now, in order to accommodate the raised chainsaw blade level, slide the jig down one more inch.
Screw the jig to the tree log from two opposite sides by running screws through both sides of the jig. This way, you won’t have to worry about it moving when you’re cutting.
STEP 4: Set the Saw to Work
Same as we’ve described in the first method, this is again the time for your chainsaw to work. Start it up, hold it comfortably in both hands, and start cutting.
To cut through the tree trunk, squeeze the throttle and lower the blade slowly. Do not put a lot of pressure on while pushing the chainsaw through the cut. Apply gentle pressure and the chainsaw would push in on its own.

In case you feel like you have to put a lot of effort into pushing the chainsaw through the cut, that means the chain is dull and you should in no way continue with a dull chain. Stop right there and sharpen the chain first.
STEP 5: Continue Cutting and Repeating
Continue cutting by just following the mark you made and let the slices fall on the ground. Repeat the same steps for as many slices as you want to cut the wood into.
YOU MIGHT ALSO WANT TO READ:
How to Cut Up a Large Tree on the Ground?
Can You Use a Chainsaw in the Rain?
Safety Precautions When Using a Chainsaw!
Here are some safety precautions to take when cutting with a chainsaw.
- You should hold your chainsaw properly when using it. Grip it comfortably. Do not apply too much or too less of pressure.
- Don’t get caught up in the kickback zone.
- Above your shoulder, do not attempt to cut anything.
How to Cut Wood Slices with Chainsaw – FAQs
Conclusion
Cutting wood slices with a chainsaw would be an easy job if you follow any of the two methods correctly and properly. It’s totally up to you to choose whatever method you want.
We hope that we’ve been helpful to our readers and after reading through our article, you’ll now know how to cut wood slices using a chainsaw!


